



Real Japanese kakigori has almost nothing in common with the shaved ice you get at a summer fair. It is not crunchy. It does not make your teeth ache. Done properly, a mound of kakigori collapses on the tongue like fresh snow and disappears before you can chew it — and the difference comes down to two things most people get wrong: the ice, and the blade. This guide covers how to make kakigori at home, what the classic flavours actually are, and the small details that separate a good bowl from a disappointing one. We cover this in detail in our guide The Food of Studio Ghibli: 7 Dishes You Can Actually Cook.
What kakigori actually is
Kakigori (かき氷, literally "shaved ice") is a block of ice shaved into long, paper-thin ribbons and served with syrup. The word matters: shaved, not crushed. Crushing ice fractures it into hard granules that sit heavy in the bowl and melt into a slush. Shaving peels the block in continuous curls that trap air, which is why a well-made kakigori can stand fifteen centimetres tall and still feel weightless.
That texture is the entire point. In Japan it is the reason a plain bowl of ice with syrup can cost as much as a restaurant dessert, and the reason serious kakigori shops queue down the street in August.
A history worth knowing before you eat it
Kakigori is one of the oldest desserts in Japan, and for most of its life it was a luxury almost nobody could have. Ice harvested in winter was stored in himuro — insulated ice houses dug into hillsides — and hauled to the capital in summer for the imperial court. Sei Shōnagon, a lady-in-waiting writing around the year 1000, records shaved ice served with a sweet vine syrup in The Pillow Book, listing it among elegant things. At the time, eating ice in summer was a display of wealth on the level of owning a mountain.
It stayed that way for eight centuries. Only in the Meiji era, as ice-making and ice-shaving machines spread, did kakigori reach ordinary people; the first shaved ice shop is believed to have opened in Yokohama in 1869. The Japanese government's own account of the dessert in Highlighting Japan makes a point that matters for home cooks: when domestic freezers arrived in the 1960s and 70s, the small cubes they produced gave a grainy result, and it was the return to large lumps of ice — which shave evenly and thinly — that brought back the texture people now queue for. We cover this in detail in our guide Japanese Recipes: Shop by Dish.
Japan marks July 25 as Kakigori Day, chosen partly because the date reads phonetically like "summer ice," and partly because a record national high temperature was set on that day in 1933.
The ice is 80% of the result
This is the part home cooks skip, and it is the part that decides everything.
Use clear ice, not cloudy ice
Ice cubes from a freezer tray are full of trapped air and dissolved minerals — that is the white cloud in the middle. Cloudy ice is brittle. It shatters under the blade instead of peeling. Clear ice is dense and shaves in ribbons.
To make clear ice at home, freeze water slowly and directionally: fill an insulated container (a small cooler box with the lid off works) and put it in the freezer. The water freezes from the top down, pushing air and impurities toward the bottom, and the top two-thirds comes out glass-clear. Cut off the cloudy base and keep the rest. Boiled-then-cooled water helps a little, but directional freezing helps far more.
Make the block as large as your freezer allows
Size is not vanity. A large block gives the blade a wide, stable surface to skim, so each pass produces a long continuous ribbon. A small block presents a narrow face, the blade bites and releases, and you get flakes. If your machine takes a 100 mm cylinder, fill the mould completely rather than half.
Temper the block before you shave it
Ice straight from a freezer at −18°C is too cold and too hard. It chips. Shops let the block sit at room temperature until the frosted white bloom on the surface turns clear and wet-looking — usually ten to twenty minutes depending on the room. The block should be only a couple of degrees below freezing when it meets the blade. This single step is the difference between snow and gravel, and it costs nothing but patience.
Manual or electric?
You cannot shave ice properly in a blender, and food processors crush rather than cut. You need a machine with a horizontal blade that skims the surface of a rotating block.
Hand-crank machines are the traditional format — the cast-metal ones you see in old Japanese sweet shops. They give you direct feedback through the handle, so you feel immediately when the ice is too cold. They are slow, which is a virtue when you are making two bowls and a vice when you are making ten. We cover this in detail in our guide Beginner's Guide to Making Sushi at Home.
Electric machines handle volume and produce a more consistent ribbon, and the better ones let you adjust blade depth to move between fine snow and a coarser flake. If you are serving a family or you want the same result every time without developing a technique, this is the sensible choice.
Whichever you pick, the blade angle is what you are really buying. Cheap machines with a fixed, blunt blade will crush no matter how well you prepared your ice, which is why it is worth looking at machines built specifically for kakigori rather than generic ice crushers — the blade geometry is not the same thing. Our own kakigori essentials covers the moulds, blades and spare parts that go with them.
The classic flavours
Syrup in Japan is usually poured, not squeezed from a bottle at the end. You want it distributed through the mound, not pooled at the base.
- Uji kintoki — matcha syrup with sweet azuki bean paste, often with mochi and a scoop of matcha ice cream. The benchmark grown-up flavour, named for Uji, the tea region south of Kyoto.
- Shirokuma — "polar bear," a Kagoshima speciality: condensed milk, fruit, and sweet beans piled on top, arranged so the bowl looks like a bear's face.
- Ichigo — strawberry, the default of every festival stall, usually finished with a drizzle of condensed milk.
- Blue Hawaii — bright blue, vaguely tropical, entirely artificial, and beloved anyway. Nobody in Japan pretends otherwise.
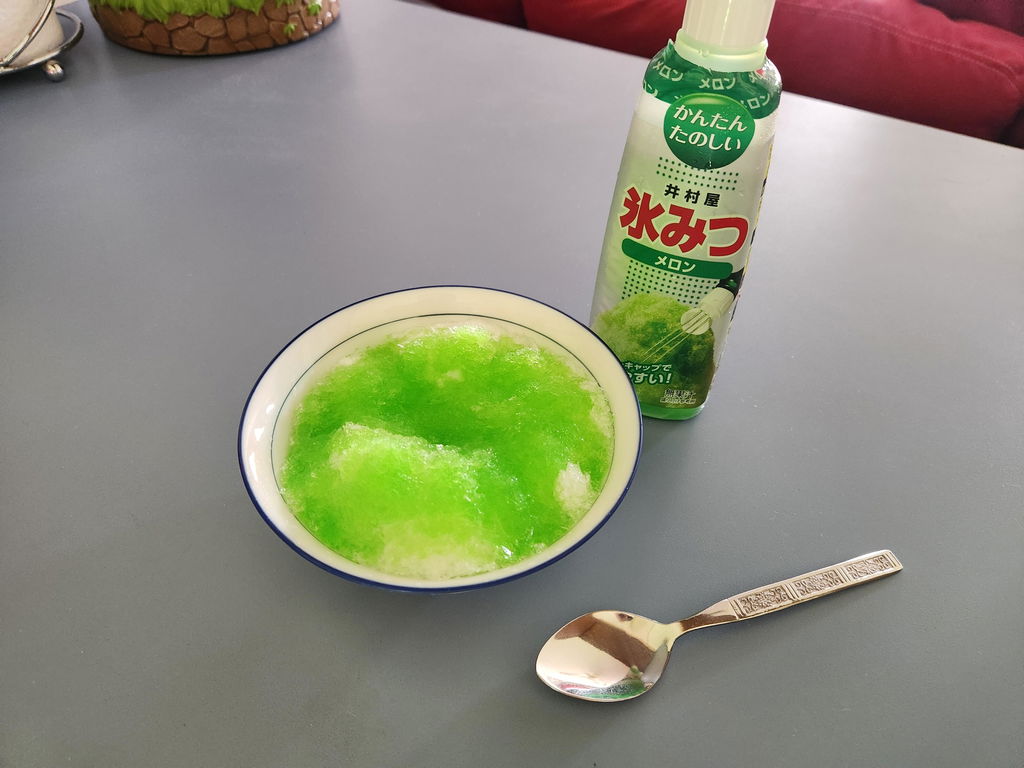
- Lemon, melon, grape, green tea — the standard festival lineup.
Condensed milk deserves a mention on its own. A spiral of it over almost any fruit syrup turns a thin, sharp flavour into something creamy, and it is the easiest upgrade available to a home cook.
If you want the toppings to taste like Japan rather than an approximation, the anko, mochi and kuromitsu you need are in our Japanese sweets selection, and our kakigori collection covers the syrups and serving bowls.
What to serve it in
The bowl is doing thermal work, not just presentation. Glass and metal chill hard and hold that cold; thick ceramic holds it longer still but takes an hour in the freezer to get there. Shallow and wide is wrong — it gives the mound nothing to sit against and increases the surface area melting. A deep bowl with near-vertical sides, around 400 ml, lets you build height and keeps the base insulated by the ice above it. Our Japanese bowls range includes the deep lidded and footed shapes that work best.
Making kakigori, step by step
- Freeze a clear block a day ahead using directional freezing.
- Chill your bowl. A room-temperature bowl melts the base of the mound before you have finished building it. Glass or metal, straight from the freezer.
- Temper the ice until the white bloom clears.
- Shave in layers. Do not build one tall pile in a single pass. Shave a base, add syrup, shave again, add syrup. Three layers is normal; kakigori specialists do more.
- Shape gently with a spoon, from the outside in. Pressing down compacts the air out and ruins the texture.
- Finish on top with condensed milk, beans, mochi or fruit — and serve immediately. Kakigori has a working life of about four minutes.
Four mistakes that ruin it
Shaving straight from the freezer. The single most common error. Cold ice shatters.
Syrup only on top. You end up with a sweet crown and a bland, watery bottom.
A warm bowl. The mound slumps from underneath and you are eating slush in two minutes.
Packing it down. Every time you press the ice, you squeeze out the air that made it worth doing.
Frequently asked questions
Can I make kakigori without a machine?
Not really — not the texture that makes it kakigori. Crushed ice in a blender gives you a granita, which is a fine dessert but a different one. A blade that skims the block is what produces the ribbons.
What is the difference between kakigori and a snow cone?
Snow cones are crushed ice with syrup poured over the top. Kakigori is shaved ice with syrup layered through it. The texture and the eating experience are not comparable.
Why does restaurant kakigori not give you brain freeze?
Because tempered, properly shaved ice is mostly air and melts almost instantly at mouth temperature. Hard, cold granules sitting against the palate are what trigger the headache.
What ice should I use for kakigori?
A single large block of clear ice, frozen slowly and directionally, then tempered at room temperature until the white surface bloom turns clear. Freezer-tray cubes are cloudy and brittle and will shatter under the blade.
How long does kakigori keep?
It does not. Build it and eat it. This is a dessert you make in front of the people eating it.
Worth the effort
Kakigori rewards preparation more than skill. Get the ice right, keep the bowl cold, layer the syrup, and even a first attempt will be better than most things sold as shaved ice outside Japan. Start with a clear block tonight and a bowl in the freezer, and you can be eating properly made kakigori tomorrow — then spend the rest of the summer arguing about whether uji kintoki or shirokuma is the correct order.